The Room Editor allows for the addition and management of Customer's Rooms in which Plates are located.
¶ User Interface Overview
¶ Room Hierarchy
A Customer's Rooms are organised underneath them in the following hierarchy:
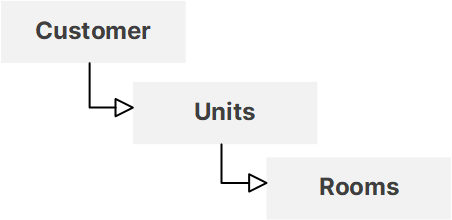
'Unit' and 'Room' are merely terms used for organisational purposes to ease administration, and do not have to relate strictly to the structure of the organisation in question. They can be arranged in whatever manner best makes sense for the way your organisation is structured.
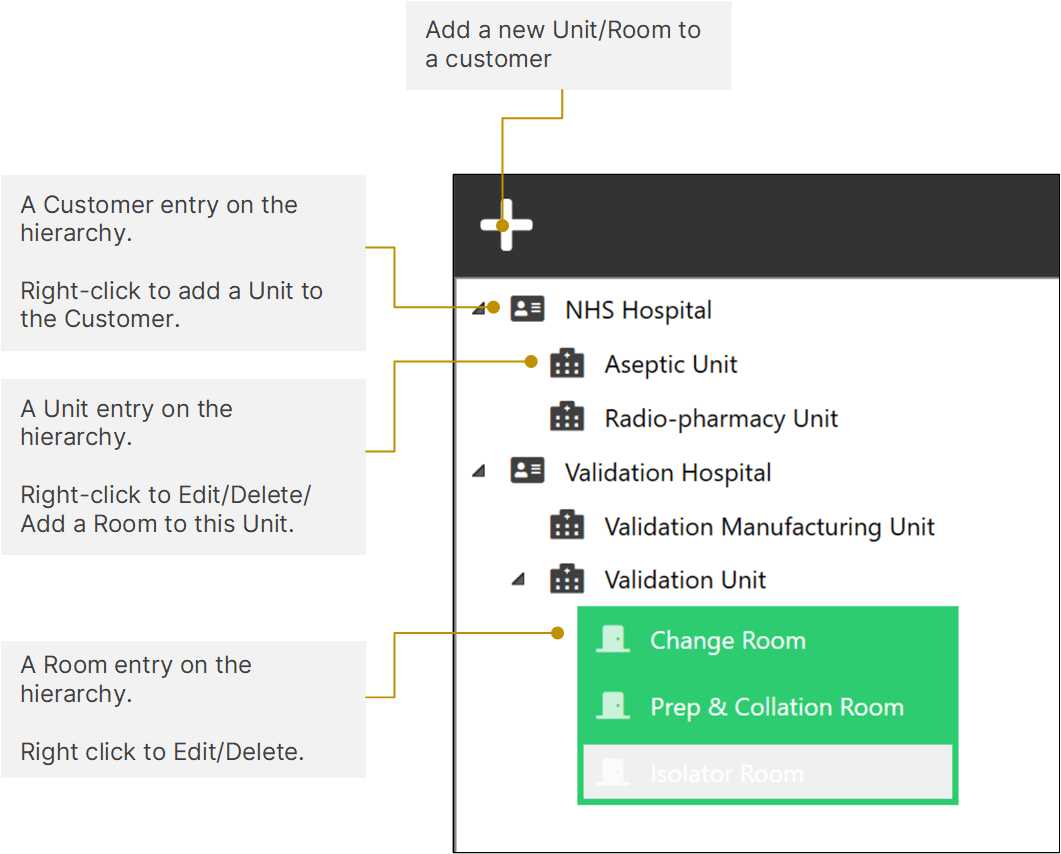
The Room Hierarchy is found on the left-hand side of the Room Editor section:
¶ Room Details
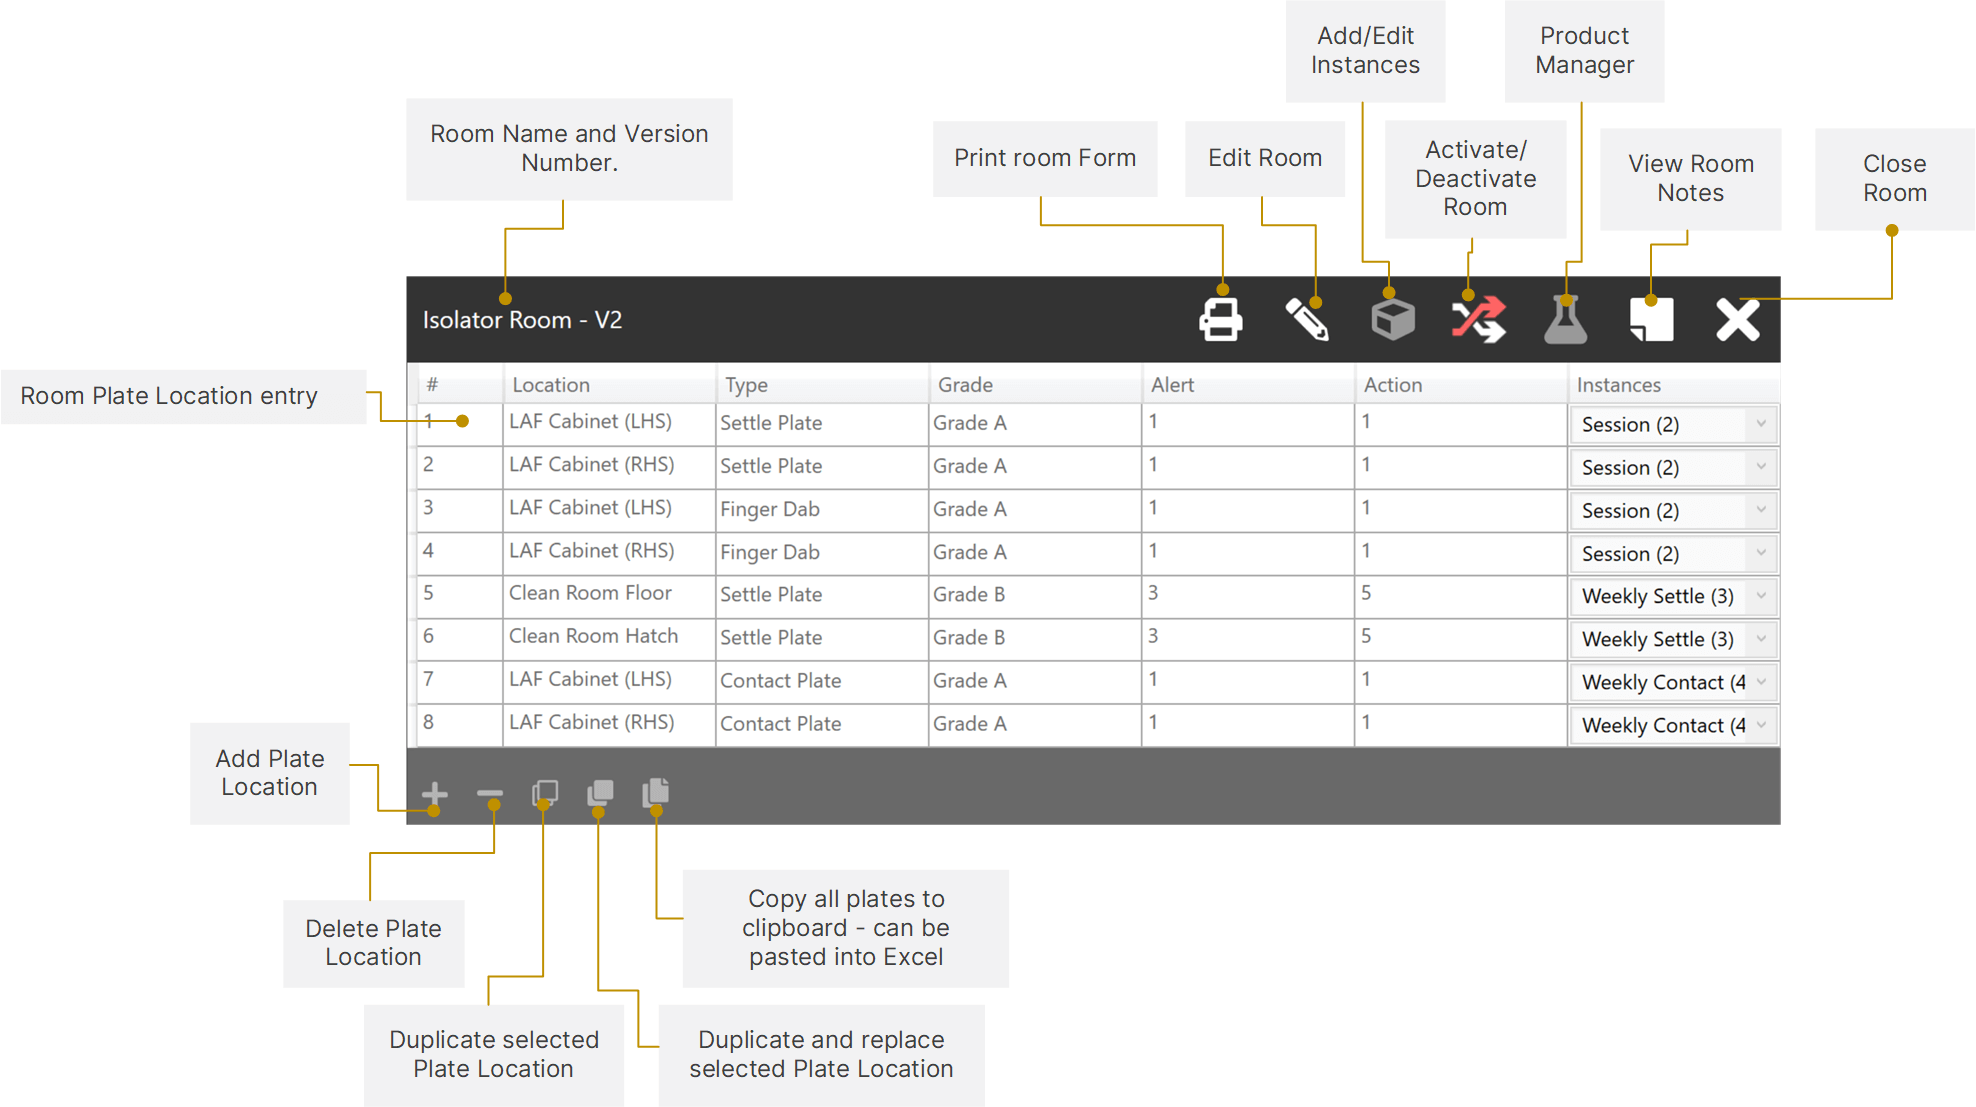
When a room is selected within the Room Hierarchy, its Plate Locations will appear in the Room Details Panel, and various management options for the Room will become available.
¶ Adding a Unit to a Customer
Units can be added to the Customer through the Room Hierarchy section of the Room Editor.
¶ 1. Select the Customer to Add the Unit to
Click ' Add Unit/Room at the top of the Room Hierarchy.
Or alternatively, right-click on the Customer in the hierarchy under which the room will sit, and click Add Unit to Customer.
Select Unit from the menu presented.
¶ 2. Add Unit Details and Save
Fill in the details of the new Unit and click Save:
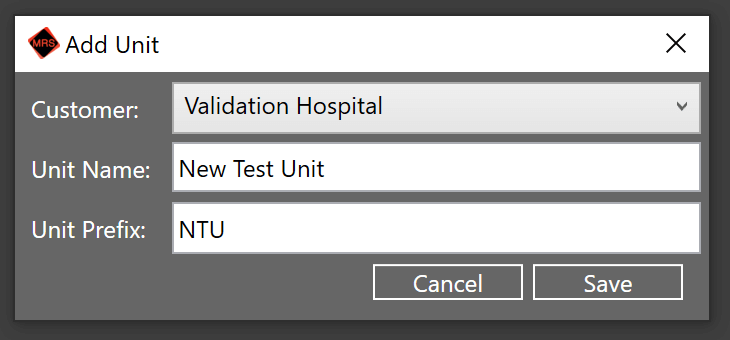
You will receive a notification confirming the creation of the new Unit, and it will become available in the Room Hierarchy.
Once your Unit has been created, you can then Add Rooms to it.
¶ Adding a Room to a Customer
Rooms can be added to Units through the Room Hierarchy section of the Room Editor.
¶ 1. Select the Customer and Unit to add the Room to
Click ' Add Unit/Room at the top of the Room Hierarchy.
Or alternatively, right-click on the Unit in the hierarchy under which the room will sit, and click Add Room to Unit.
¶ 2. Enter the Room Details
This will bring up the Add Room menu, where the settings of the new room can be entered.
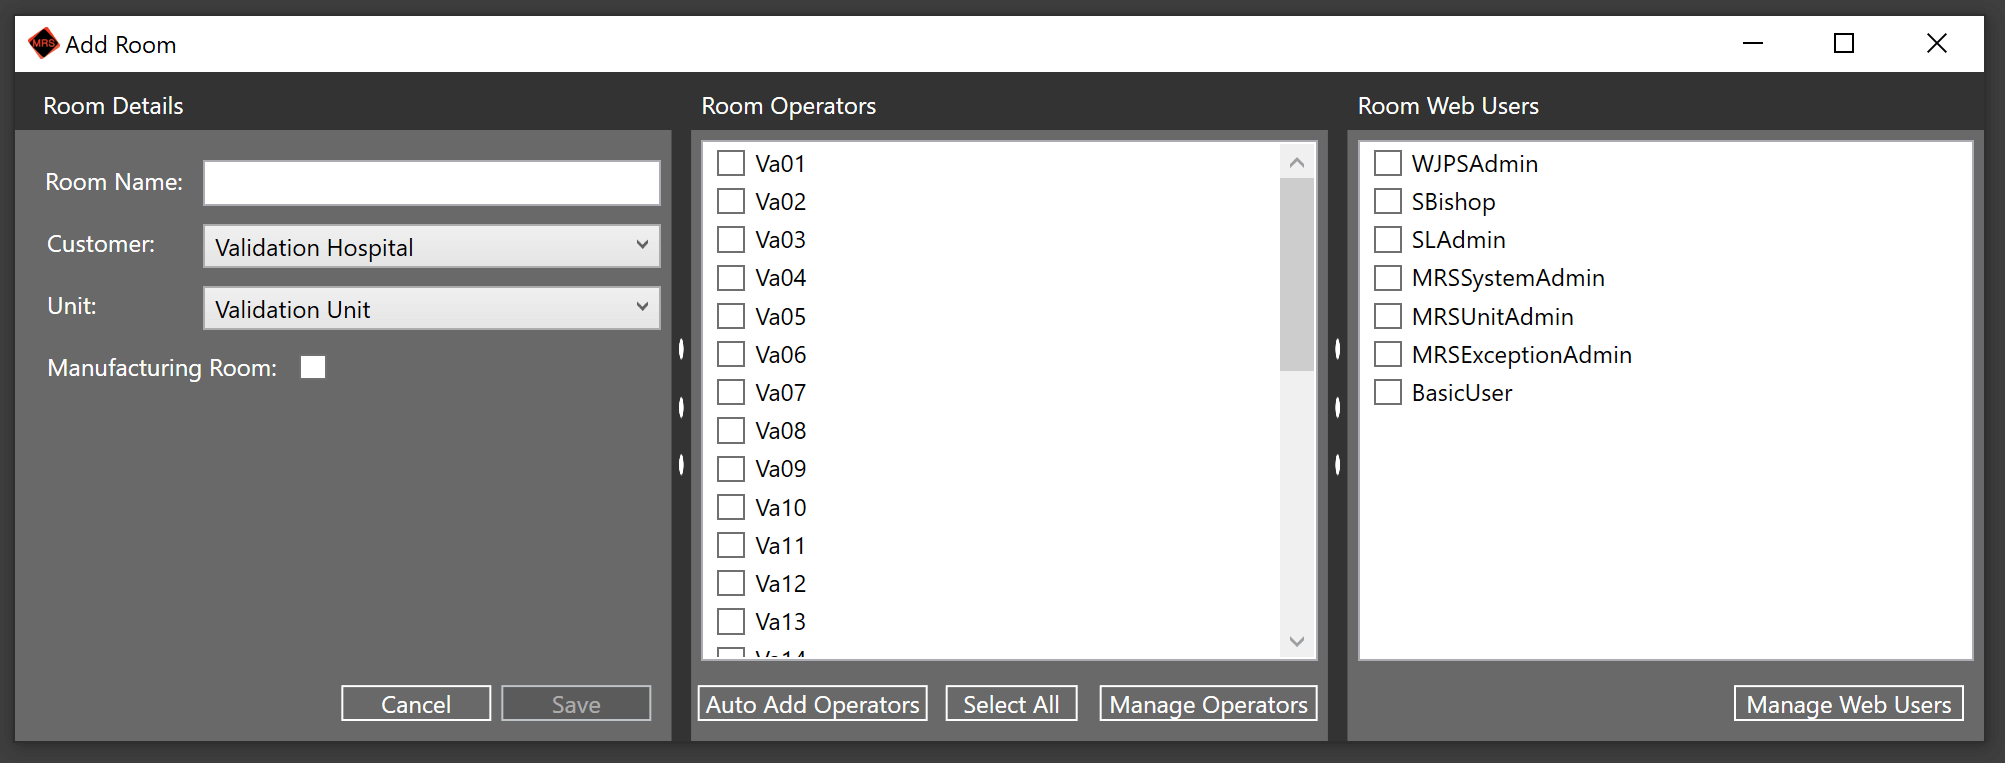
The Room Name can be entered in the left-hand pane, along with the Customer and Unit that it falls under.
The Manufacturing Room checkbox should be selected if the room is used for Batch Manufacturing.
¶ 3. Add Operators
Operators can be added to the room from the central pane.
Tick each operator that needs to be added, or click Select All to select every available operator.
- Auto-Add Operators will add 10 generically named operators to the room based on the Unit prefix.
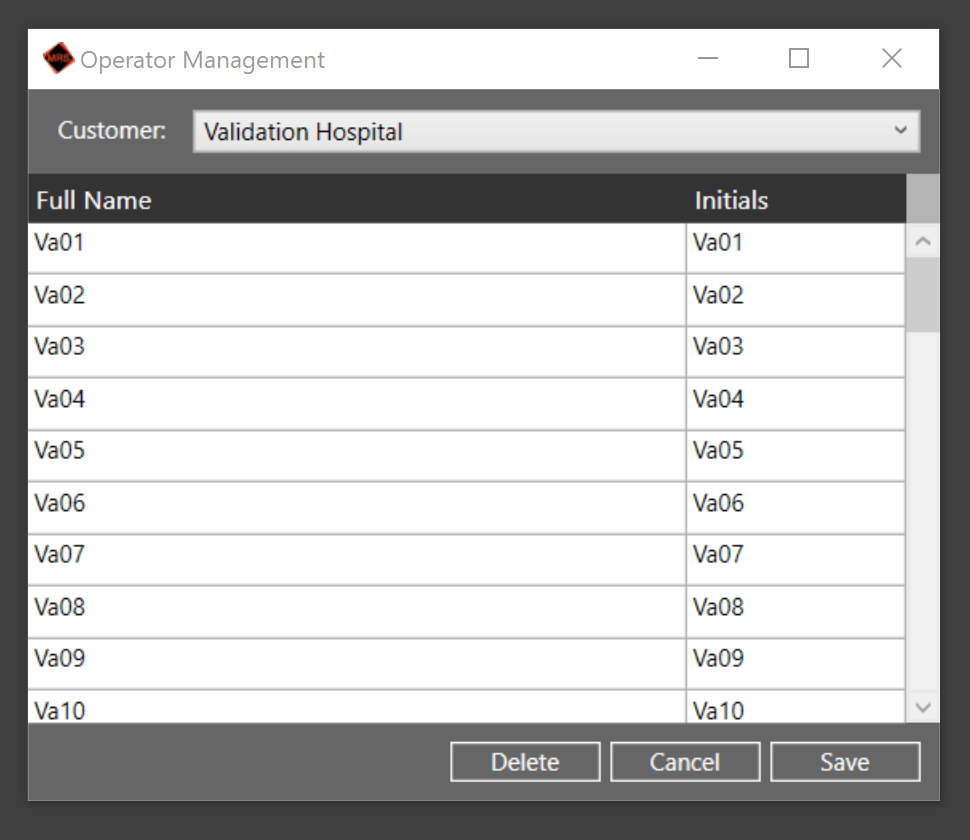
- Manage Operators will bring up the Operator Management dialog where operators can be added or deleted for each Customer.
¶ 4. Assign Web Users
Web Users can then be assigned access to the room using the right-hand pane.
Simply tick each Web User that should be allowed access.
Manage Web Users will bring up a dialog in which you can Add/Delete Web Users from the system.
¶ 5. Save the Room
Once the Room has been set up to your desired specification, click Save below the Room details panel, to finish the creation of the new Room.
It will then appear underneath your chosen Unit in the Room Hierarchy in Red, signaling that is currently deactivated and cannot be used.
Once your Room has been created, Plate Locations can be set up and managed.
¶ Adding Plate Locations
Plate Locations can be added or removed within a Room through the Plate Location Management Menu at the bottom of the Room Details section:
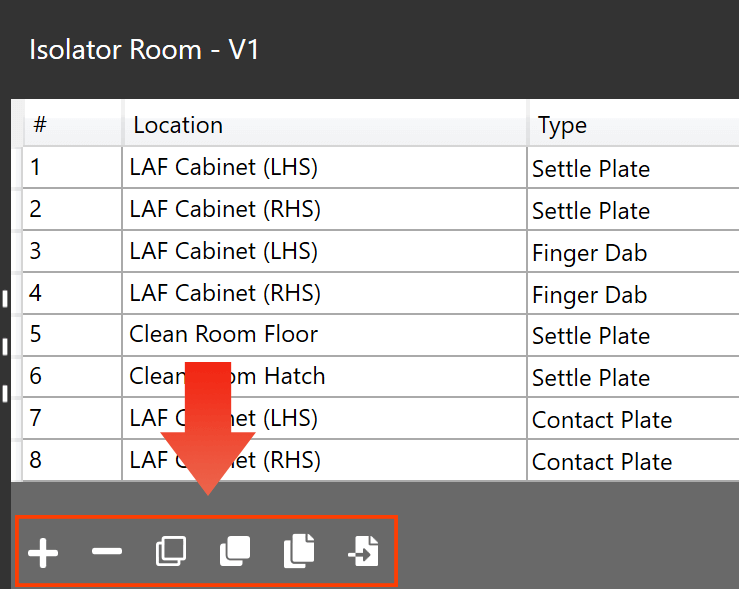
Click the Plus button to add a new Location.
This will create a new row, into which you can enter the name and details of the new location, as well as add it to any Instances.
The Action Level will automatically fill with the appropriate level for the specified Grade, as specified in the Grade Editor.
Once Locations have been added, Click Save to save the changes you have made.
You should receive a notification confirming this has been completed.
¶ Video Demonstration
¶ Additional Options for Adding Plates
To speed up the process of adding Plate Locations, MRS contains a few extra operations which you may find useful:
¶ Duplicate Plates
The Duplicate Plates option will add a duplicate for each of the currently selected rows, each of which can then be edited accordingly.
These new, duplicated rows will have '(copy)' appended to their names in order to differentiate them.
This option can also be invoked by the shortcut Ctrl + D
¶ Video Demonstration
¶ Duplicate Instances
The the next Plate has the same instances as the Plate you are on, you can Press Ctrl + D. This will copy only the instances and set the next plate to be selected.
¶ Duplicate and Replace Plates
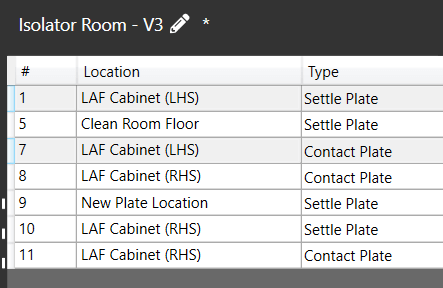
The Duplicate and Replace Plates option can be used to duplicate and replace part of the Plate Location name that all the selected plates have in common.
For example, if you have a cabinet and have added all of the 'Left-Hand Side' plates - which you are identifying with adding '(LHS)' to the plate name, and now you want to add plates with the exact same settings for the Right-Hand Side.
You can select your Left-Hand Side Plates:
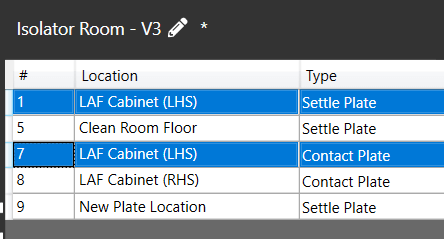
Click the Option, and choose to replace '(LHS)' with '(RHS)':

Which will then create the plates with exactly the same settings, but with 'RHS' names:
¶ Video Demonstration
¶ Removing Plate Locations
Highlight the row of the Plate Location(s) you wish to delete by clicking on the Relevant row number.
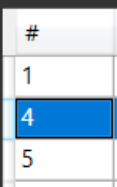
You can click and drag to select multiple adjacent rows, or Hold Ctrl and Click on the row numbers of isolated plate locations to select them.
Click the Remove Plate Location icon .
Click Save to save the changes you have made.
You should receive a notification confirming this has been completed.
¶ Video Demonstration
¶ Export Plate Locations
Plate Located can also be export to the clipboard, ideally to go in to excel. Using the Copy All Plates button, the plates will be in your clipboard and you can then open Microsoft Excel and paste them in.
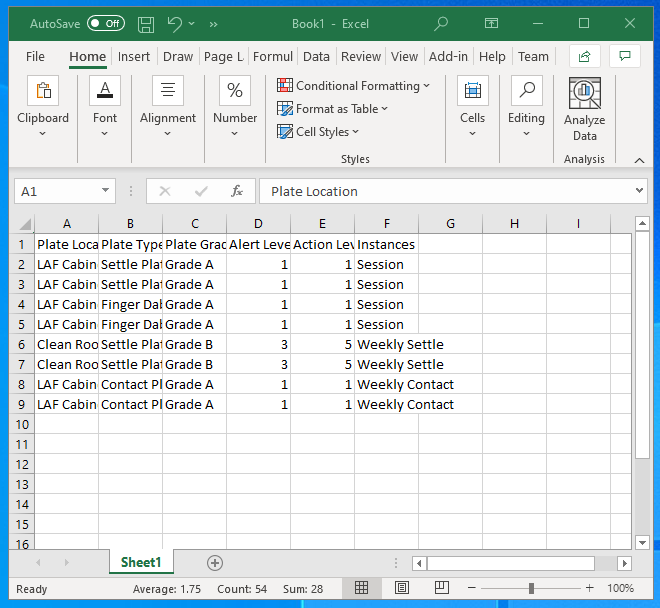
Changes can be made to this file. To save these changes so they can be Imported, please save the file as a Comma Separated Value (CSV).
¶ Importing Plate Locations
Plate Locations can also be imported from a CSV file into an existing Room, using the Plate Import button in the Plate Location Management Menu at the bottom of the Room Details section:
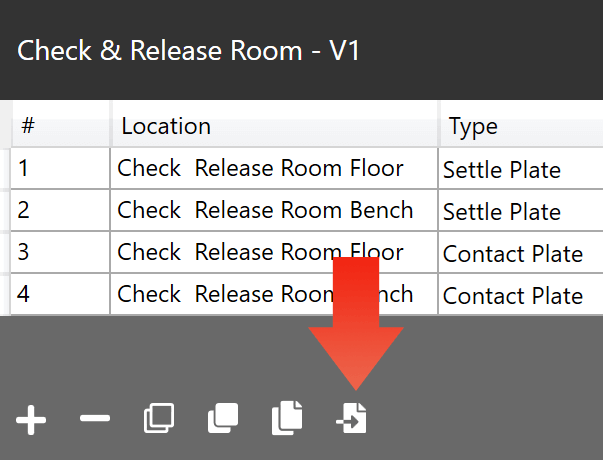
Any plates imported will be in addition to plates already set up within the room.
The CSV file containing the room set-up can be created through exporting the set-up of an existing room from within MRS, or in a Spreadsheet-style manner within Microsoft Excel or another similar program.
The following example will assume Microsoft Excel is being used to edit the CSV.
¶ 1. Prepare the CSV File
The CSV file must be in a particular format, otherwise it will not be importable by MRS.
Download this example file to use as a template - remember to delete the example data, but leave the headings:
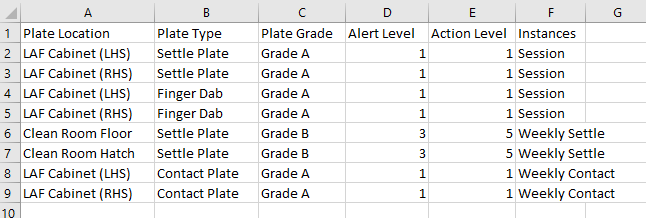
You can name the Plate Locations however you choose, but the names within Plate Type and Plate Grade must match exactly to Plate Types and Grades already present within your installation of MRS and are case-sensitive.
For example, if 'Grade A' is the designation for A-Grade plates within MRS, 'Grade A' must be entered in the Plate Type column, and not just 'A'.
Instances can be provided in a comma-separated list of the Instance Names. These can also be left blank and set up within the Room Editor.
Enter the details of your plate locations on each row and ensure the file is correctly saved as a Comma Separated Value (CSV) file.
¶ 2. Import the CSV File into MRS
Navigate to the Room you wish to add the plates to within the Room Editor of MRS (ensuring that it is deactivated) and click the Import Plates button .
Select the saved CSV file from the previous step.
You should now see your plates successfully added alongside any already existing within the room.
Add applicable Instances to the imported plates, then click the Save Room button .