¶ Entering Results for Booked-In Plates
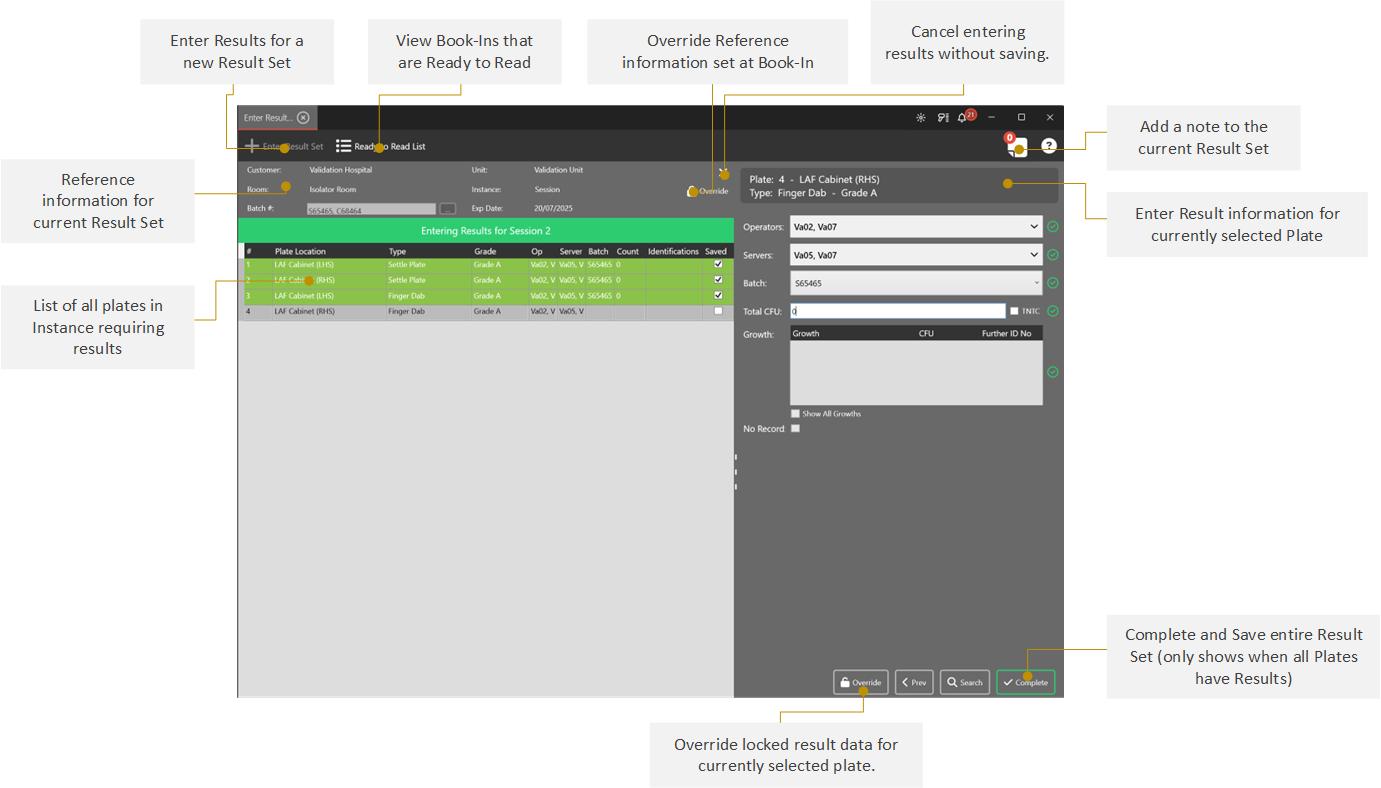
¶ User Interface Overview
Results can be entered for Booked in Plates that have been incubated for the required amount of time through in Enter Results section of MRS.
¶ 1. Scan Barcodes
In the main Enter Results Section, click the Enter Result Set button below the Tabbed Navigation which will bring up the Scan Barcodes window.
Scan in both the Plate Stack and Sheet Barcodes.
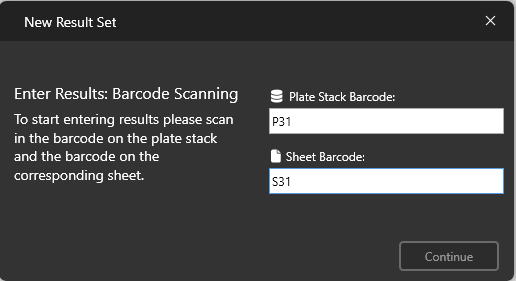
Once scanned, MRS will progress automatically to the next section.
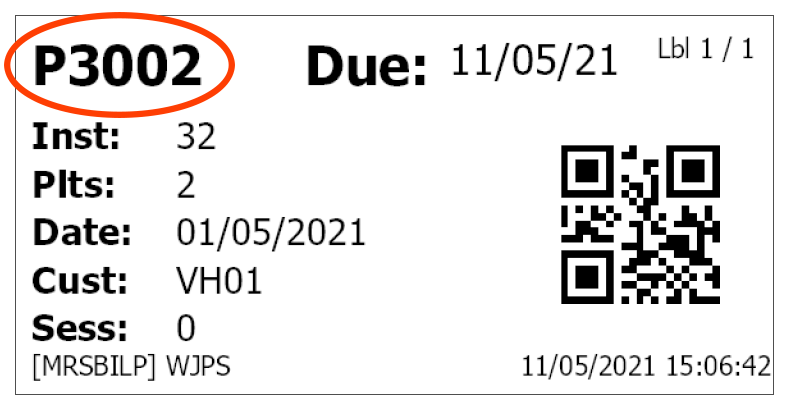
Barcodes can also be typed in manually - the reference that should be typed is printed on the top-left of the relevant labels (highlighted below):
MRS will not automatically progress on to the next section when barcodes are typed manually.
Instead, press the Tab key when both barcodes have been entered to progress.
If the returned Instance is Sessional, at this point you will be prompted to enter which Session you would like to enter Results for.
¶ 2. Read the Plates
Enter the Plate Location Number of the first plate that will be read and click OK.
Depending on your MRS configuration, you may not encounter this step and instead be forced to enter plates in order of Plate Number.
¶ Adding Plate Images with MRS Cube
From version 3.4.0 onwards there is an option to add an image to a plate using MRS Cube. First you need to ensure that plate capture is turned on for you by WJPS - please contact the helpdesk if you need this enabling.
¶ Adding an Image
When entering results you can add one or more images to an individual plate. When you have selected a plate to enter a result by double cliking on it you can click the Open MRS Cube Camera button.
When on the appropriate plate click the Take Photo button. You can take more than one image for a plate (e.g. on a light background and dark background).
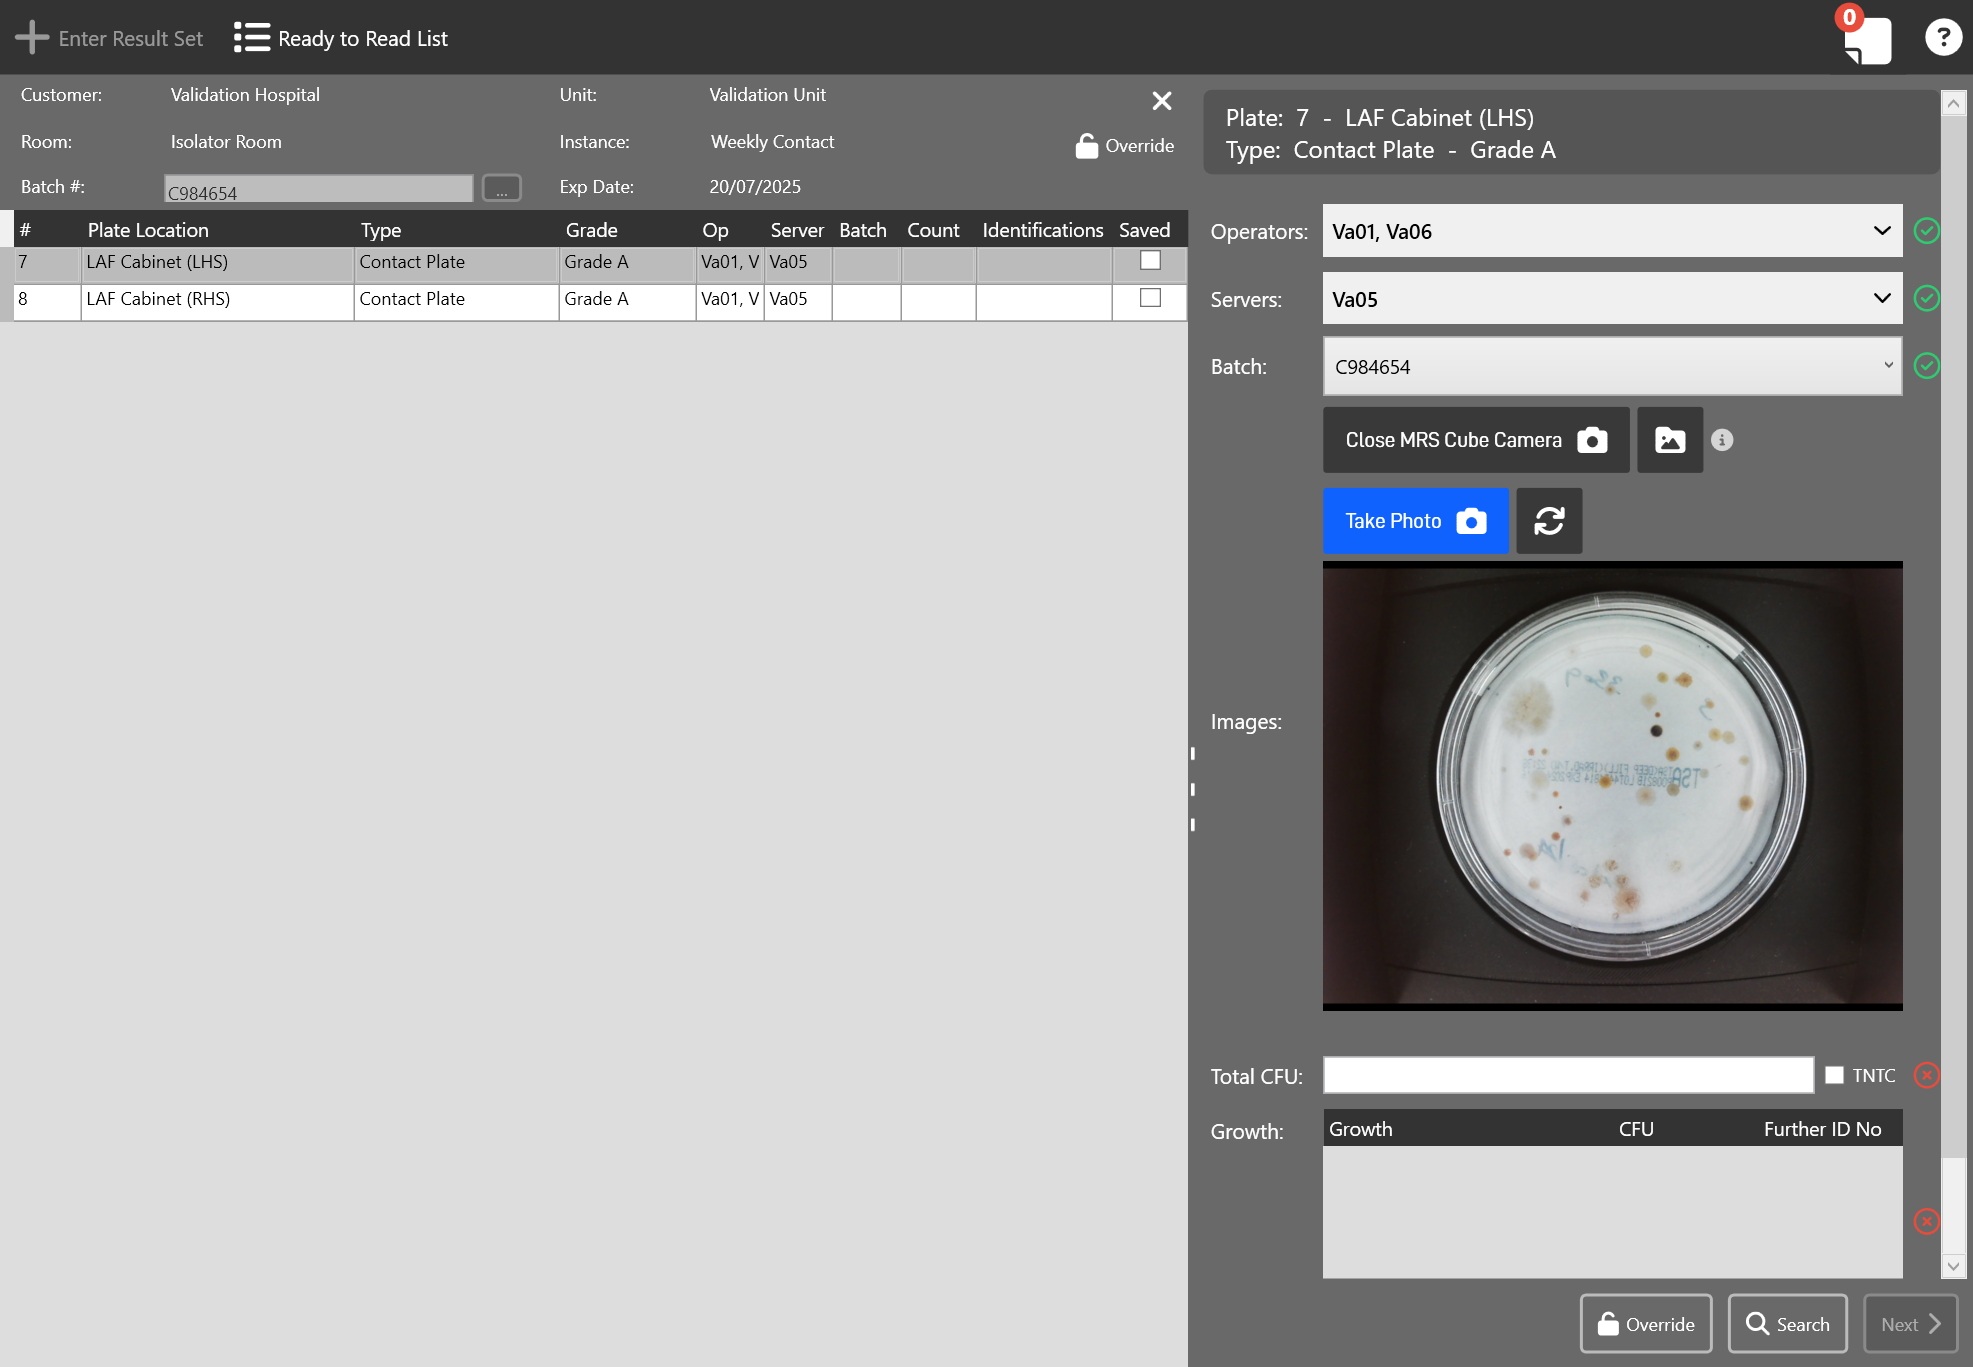
N.B you can also add an image which is already on your PC by clicking on the File / Photo icon.
¶ Second Read Results
Second read mode will enable the system to choose random results to be second read based on criteria you set for the percentage of results you wish to be second read. You can also choose for all results of a specific user to be second read for training purposes for example.
To enable second read mode please ask WJPS to switch this on for you and specify the percentage of results you wish to be second read.
When reading plates in second read mode if the system selects a result set to be second read then a pop up will appear after you confim the result set to ask you to put the plates aside to be second read.
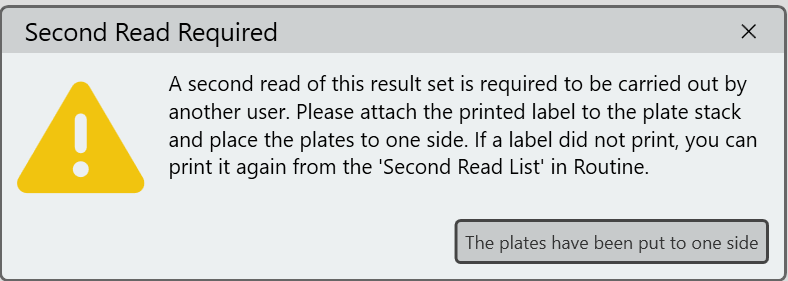
Under the enter results tab in routine you will find two extra tabs.

- Results Awaiting a Second Read - takes you to a list of all result sets awaiting second read
- Start Second Read - allows you to scan the second read barcodes to start the second read
When the second read starts the person doing the second read has no visability of the first read and reads the plates in the same way.
¶ Choosing a Read
When both reads have been performed then one read is chosen to be the final result set.
If there is no conflict between the reads then the system will automatically choose the first read as the final result set.
If there is a conflict between the two reads then on completion of the second read a pop up will show which will alert the user and ask them to put the plates aside to be checked.
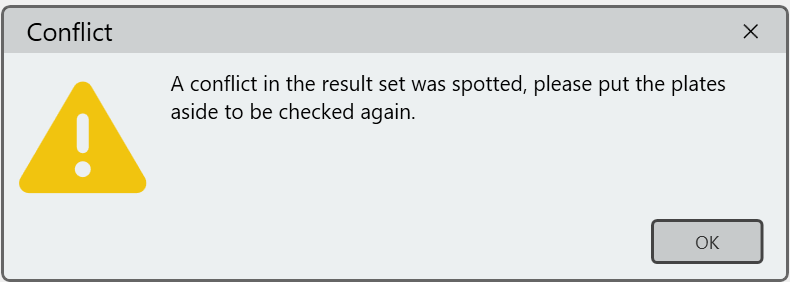
In the release results list a result set highlighted in purple indicates a second read conflict.

Opening up the result set will bring up the conflict manager. Here you can choose whether to use the first read or second read results.
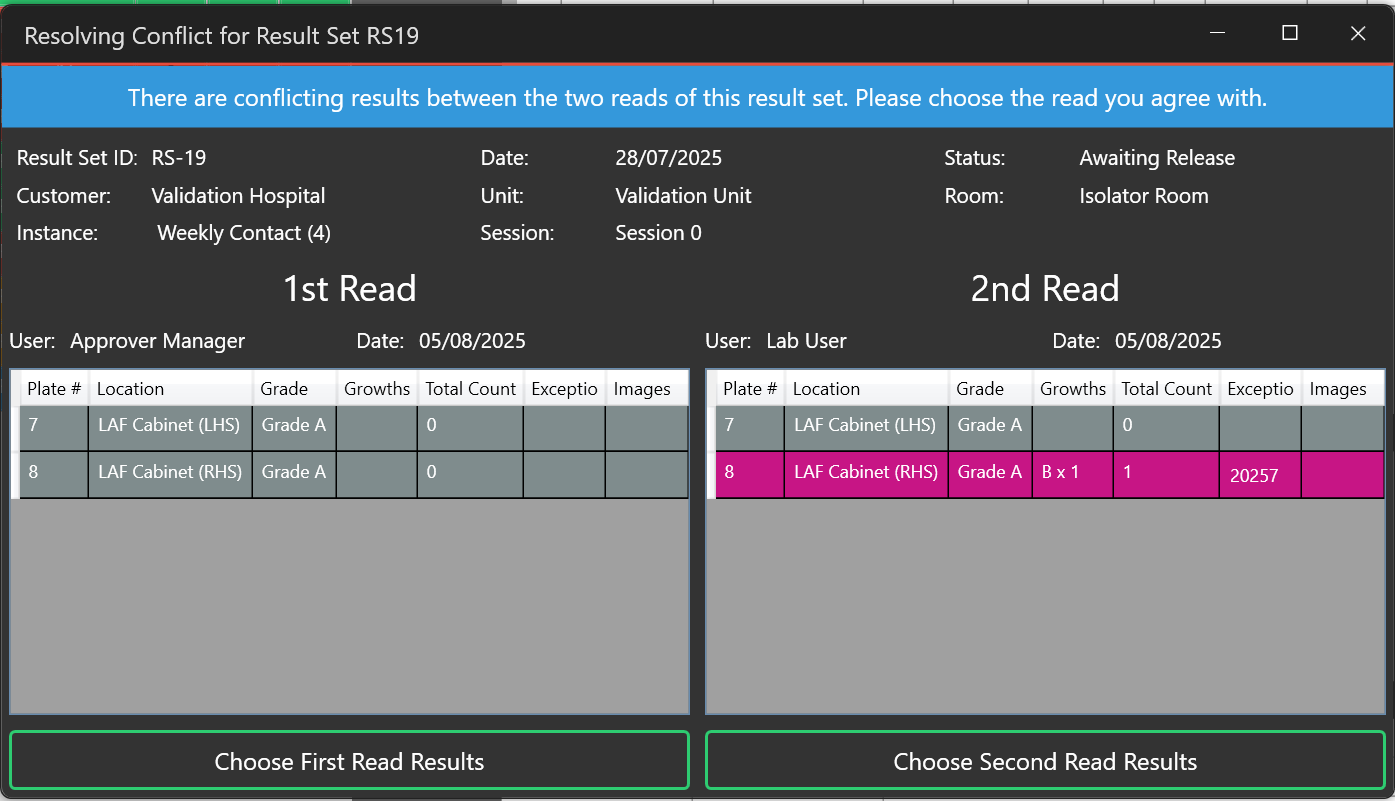
Once a read is chosen that result set will be the one which is then able to be released in the normal way to the customer. If any ID’s were generated by the non-chosen read then they will be deleted from the identifications list.
Both result sets are still able to be viewed by clicking the View Second Read Info box in the result set.
¶ Viewing Result Sets
¶ User Interface Overview
¶ Main Section
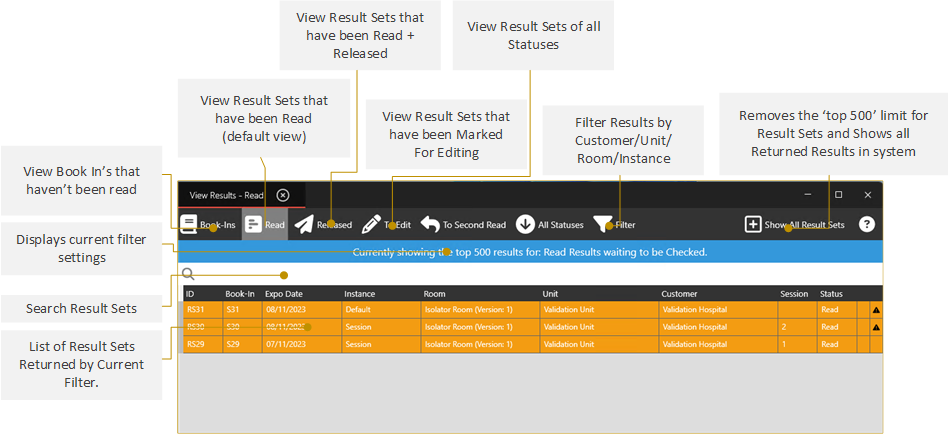
¶ Result Set Selected
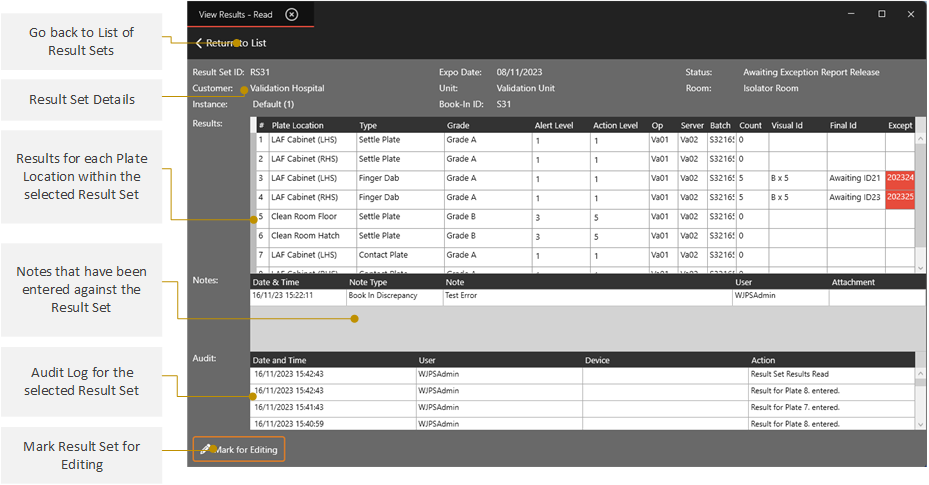
¶ Viewing a Single Result Set
¶ 1. Navigate to the Result Set
From the Main View Results Section, choose the category of Result Set you wish to view from the Menu beneath the Tabbed Navigation:
![]()
- Book Ins Lists any Booked-In Instances that have yet to be read.
- Read Lists all Result Sets that have been Read, but not yet checked and released.
- Released Lists all Result Sets that have been checked and released.
- To Edit Lists all Result Sets that have been marked for Editing.
- All Statuses Shows all Result Sets, regardless of status.
- Filter Allows you to filter the currently listed Result Sets by Customer/Unit/Room/Instance:

Click the Filter button again to deactivate it.
¶ 2. View The Result Set Information
After choosing the category of Result Sets you wish to view, Result Sets in your chosen category will appear in the table below:
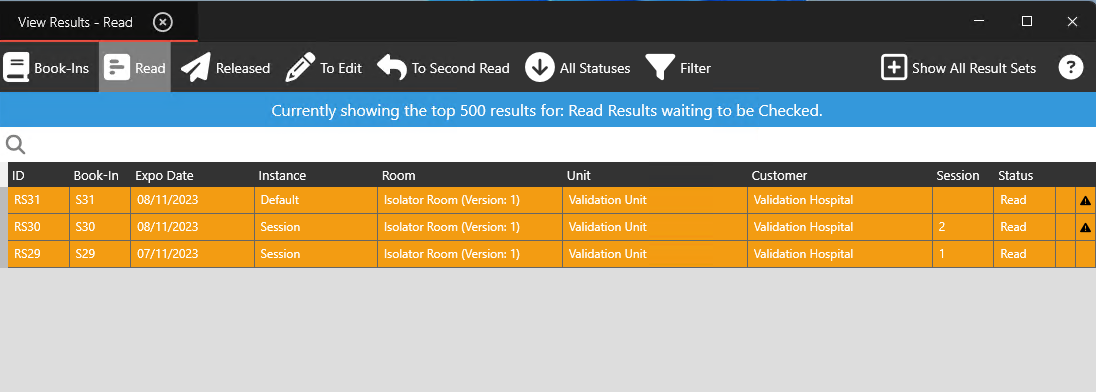
In order to increase system speed, the number of results shown by deault is limited to 500, however all Result Sets can be shown, by selecting the Show All Result Sets button.
Double-click the one you wish to open.
You should now see the details of your chosen Result Set:
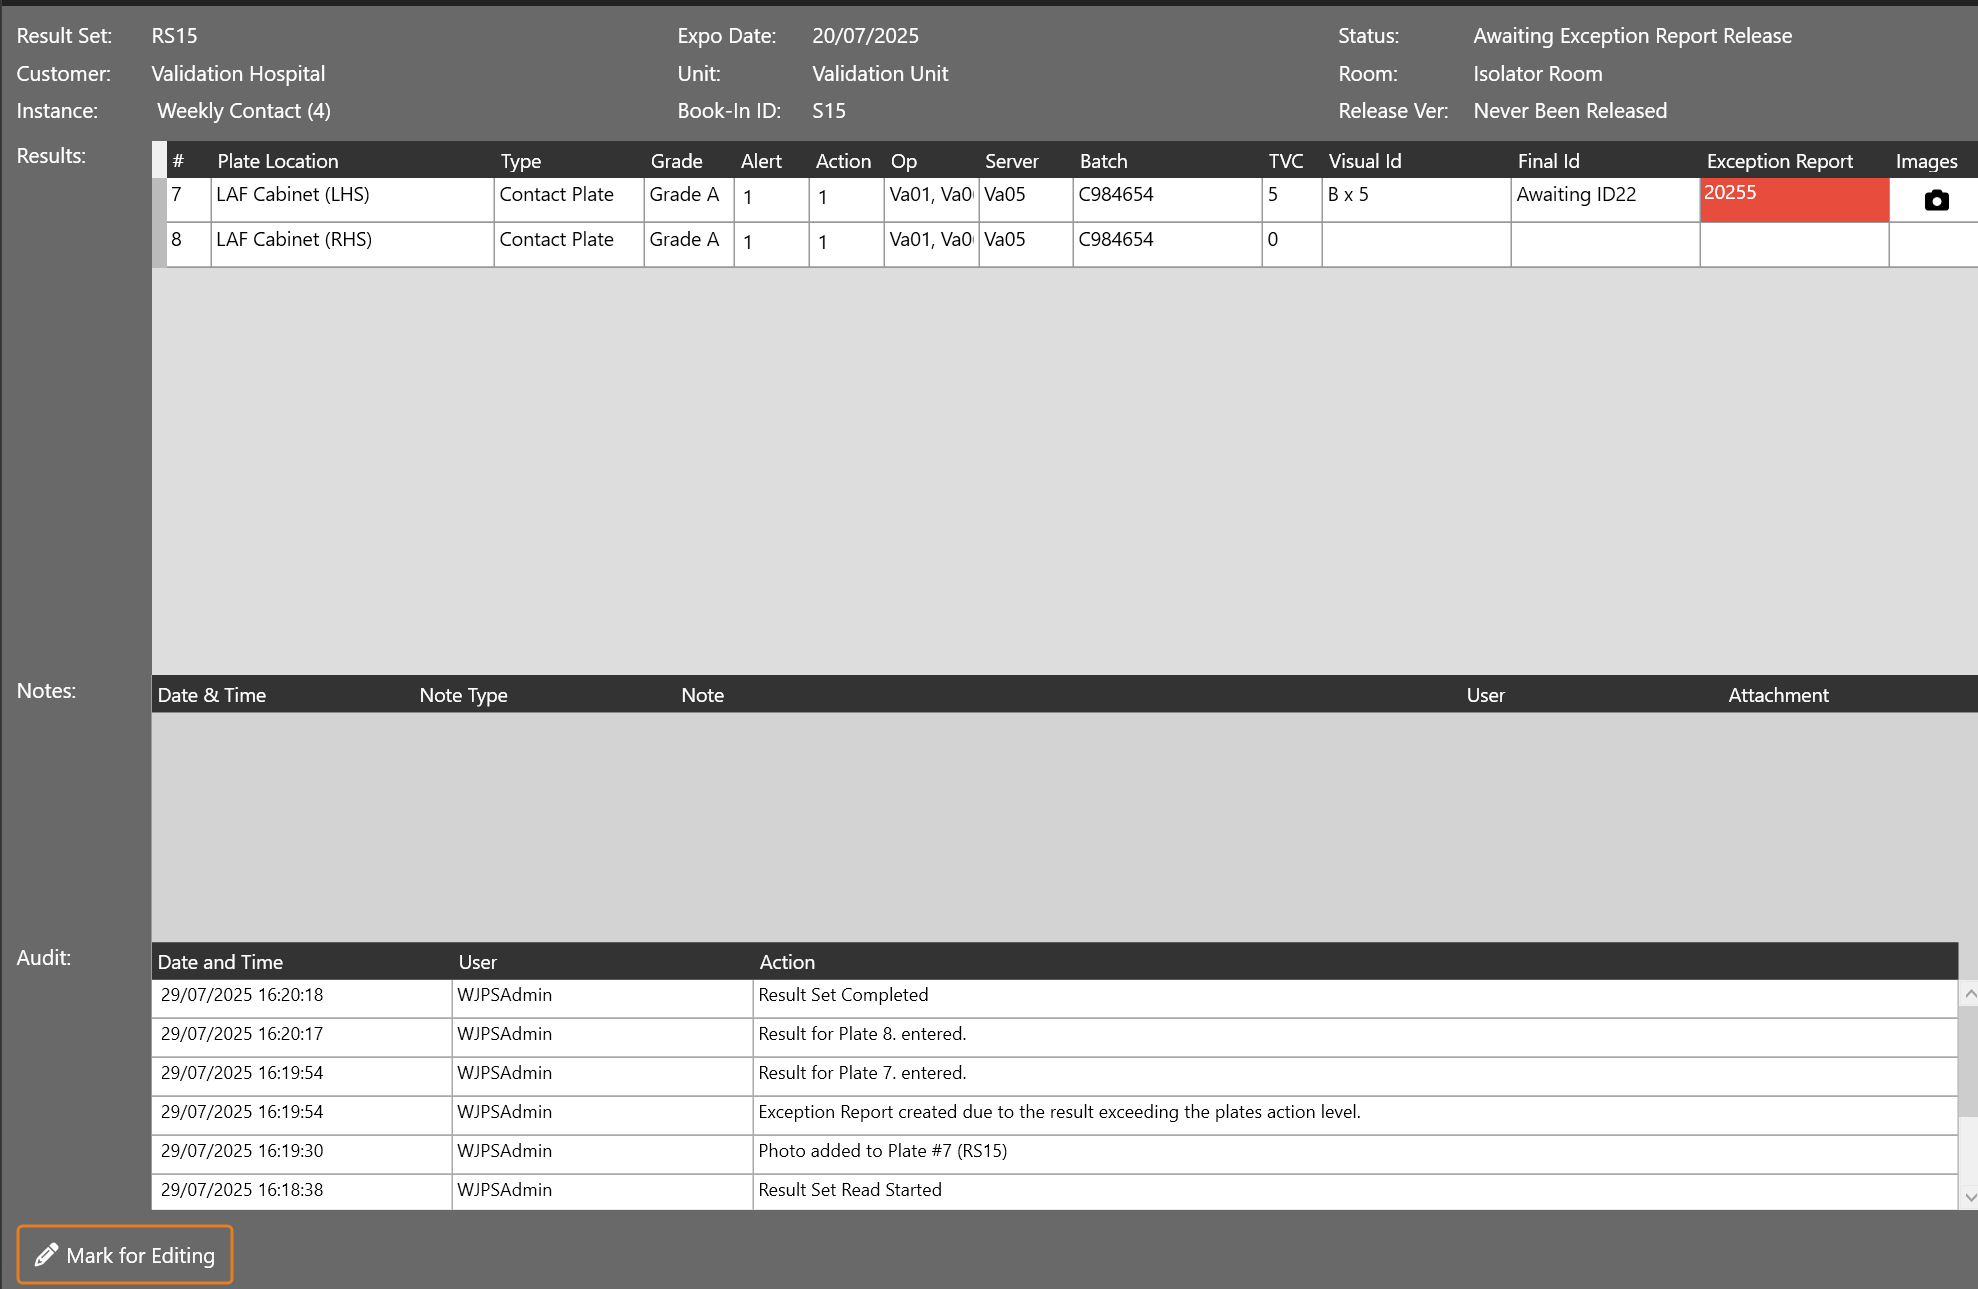
When viewing a result set you can see if any of the plates have images against them by the icon in the images tab in the result set.
If you click on the icon then it will open up the image in a larger window where you can view more details and zoom in to look more closely at the image.
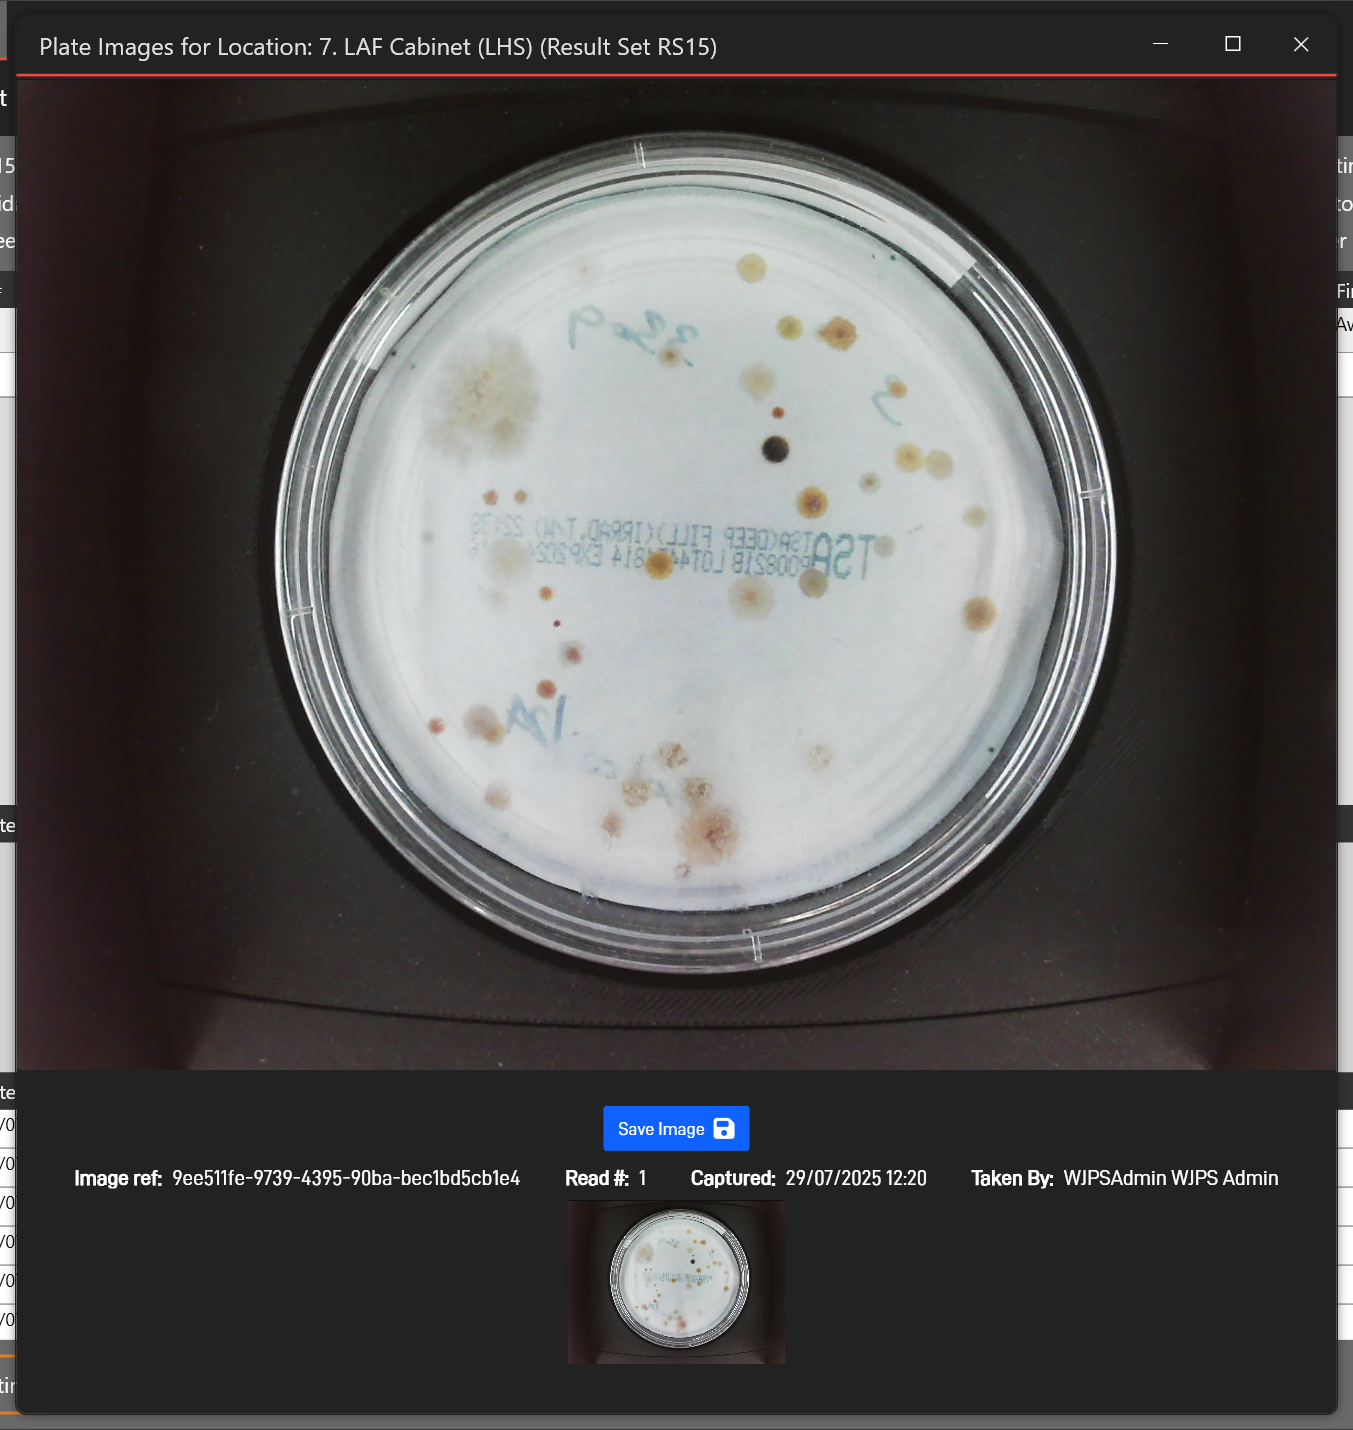
You can go back to the main list of Result Sets by clicking the Return to List button on the top left-side of the Result Set window shown above.
¶ Searching For a Result Set
If you’re trying to find a specific Result Set within the View Results section, you can search for it using the built-in Search Field.
In the Main View Results section, click inside the white text field beneath the top menu:

Type in the identifying information to help find what you’re searching for and hit Enter to perform the search - all of the shown fields are Searchable:
- ID
- Book In
- Exposure Date
- Instance
- Room
- Unit
- Status
For example if you wanted to search for all Result Sets that were exposed in 2021 - you could just type in ‘2021’ and these would be returned.
Similarly, searching for ‘Session’ will return Results that have the word ‘Session’ in any of their fields.
¶ Releasing a Result Set
¶ 1. Select the Result Set to be Released
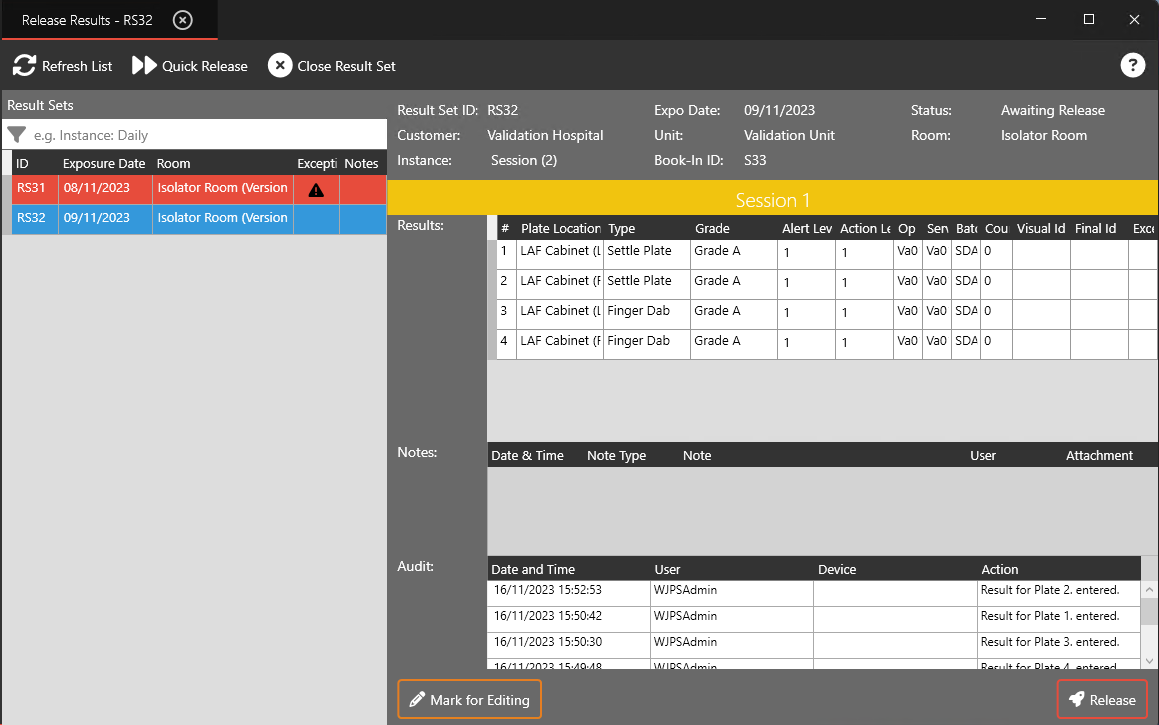
From within the Release Results Main section, click on the Result Set entry within the displayed list of Result Sets that you wish to Release.
The chosen Result Set will then be loaded, and you will be able to review its details:
¶ 2. Release the Results
If the Result Set is able to be released, the Release button in the bottom-right will activate - click this to continue:
- Release will Release the current Result Set, then take you back to the main list of Result Sets.
If this button is Deactivated, this means that this Result Set has an Alert/Exception report that has not yet been approved.
This must be done before the button will activate.You can access these reports directly from this screen by clicking the coloured Alert/Exception ID from the relevant Result Line.
It will show Yellow for Alert reports and Red for Exception reports.Once these reports have been released (See Viewing and Releasing Alert/Exception Reports), the button will activate and the Result Set can be released.
Generally speaking, you should not be releasing any Result Sets that you yourself have Read, however in some instances this is unavoidable.
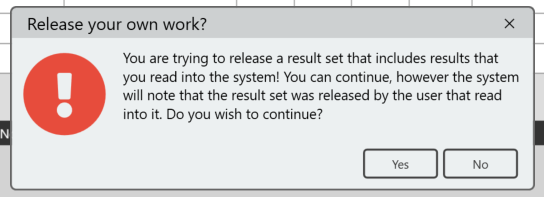
If you are doing this, when you release a Result Set, you will receive an alert asking you to confirm you wish to Release your own work:
If you click Yes, you will be prompted to enter in your Password or PIN to finally confirm the release.
Now you must enter a Release Comment, then click Save to complete the release.
The Result Set has now been released and you will see a confirmation notification display briefly:

It will now be viewable by the Customer from within MRS Web.
¶ Quick-Releasing a Result Set
If you have many Result Sets that require no further action before releasing (these show Green in the Release Results Section), you can release them all at once from within the Release Results Main Section, rather than going into each one individually.
When in the Main Section of Release Results click the Quick Release button at the top of the window:
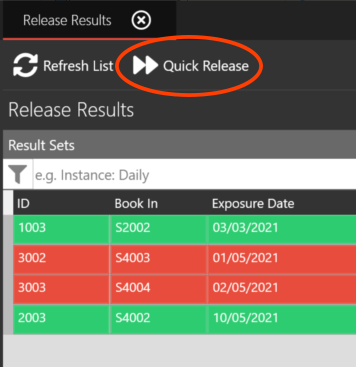
All Result Sets that are eligible will now be released and disappear from the Release Results section.
These Result Sets can still be viewed through the Released section of View Results.
Results highlighted in Red are ineligible for Quick Release as they have outstanding Alert/Exception Reports that must be checked and released themselves before the associated Result Set can be released.
¶ Editing a Result Set
If a Result Sets data is incorrect and it has already been Read or Released, the Results can be edited and corrected.
¶ 1. Open the Result Set
Access the Result Set that needs to be edited. (See Viewing an Individual Result Set)
Click the Mark for Editing button at the bottom left of the page, below the Result Set details.
¶ 2. Mark Result Set For Editing
You will then be required to enter a Note, explaining why the Result Set needs editing:
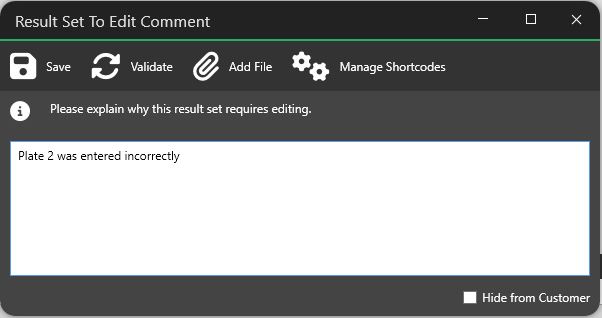
Click the Save button to finish adding the Note.
The Result Set will now have been placed in the To Edit section which can be accessed by going back to the Main Result Sets section and selecting the To Edit button from the top-menu.
¶ 3. Edit The Result Set
All Result Sets Marked for Editing will then be shown:

Double-click the result set you wish to Edit.
The Result Set will then be opened and you will immediately be shown the reason for the amendment in an alert message:
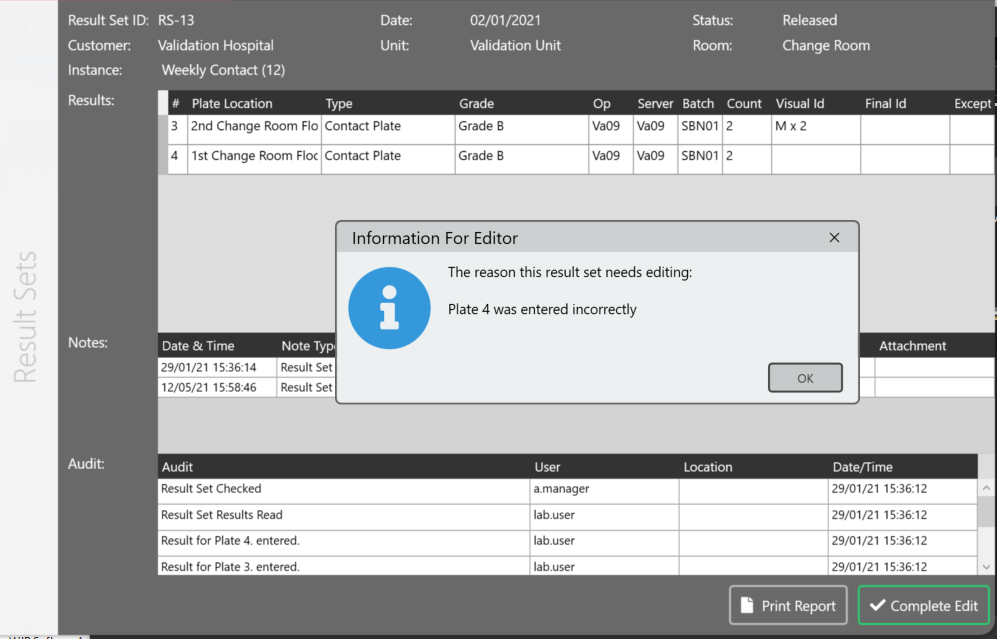
Dismiss the alert by clicking OK and then double-click the result you wish to change.
This will bring up the Edit Result Form, on the right-hand side of the window.
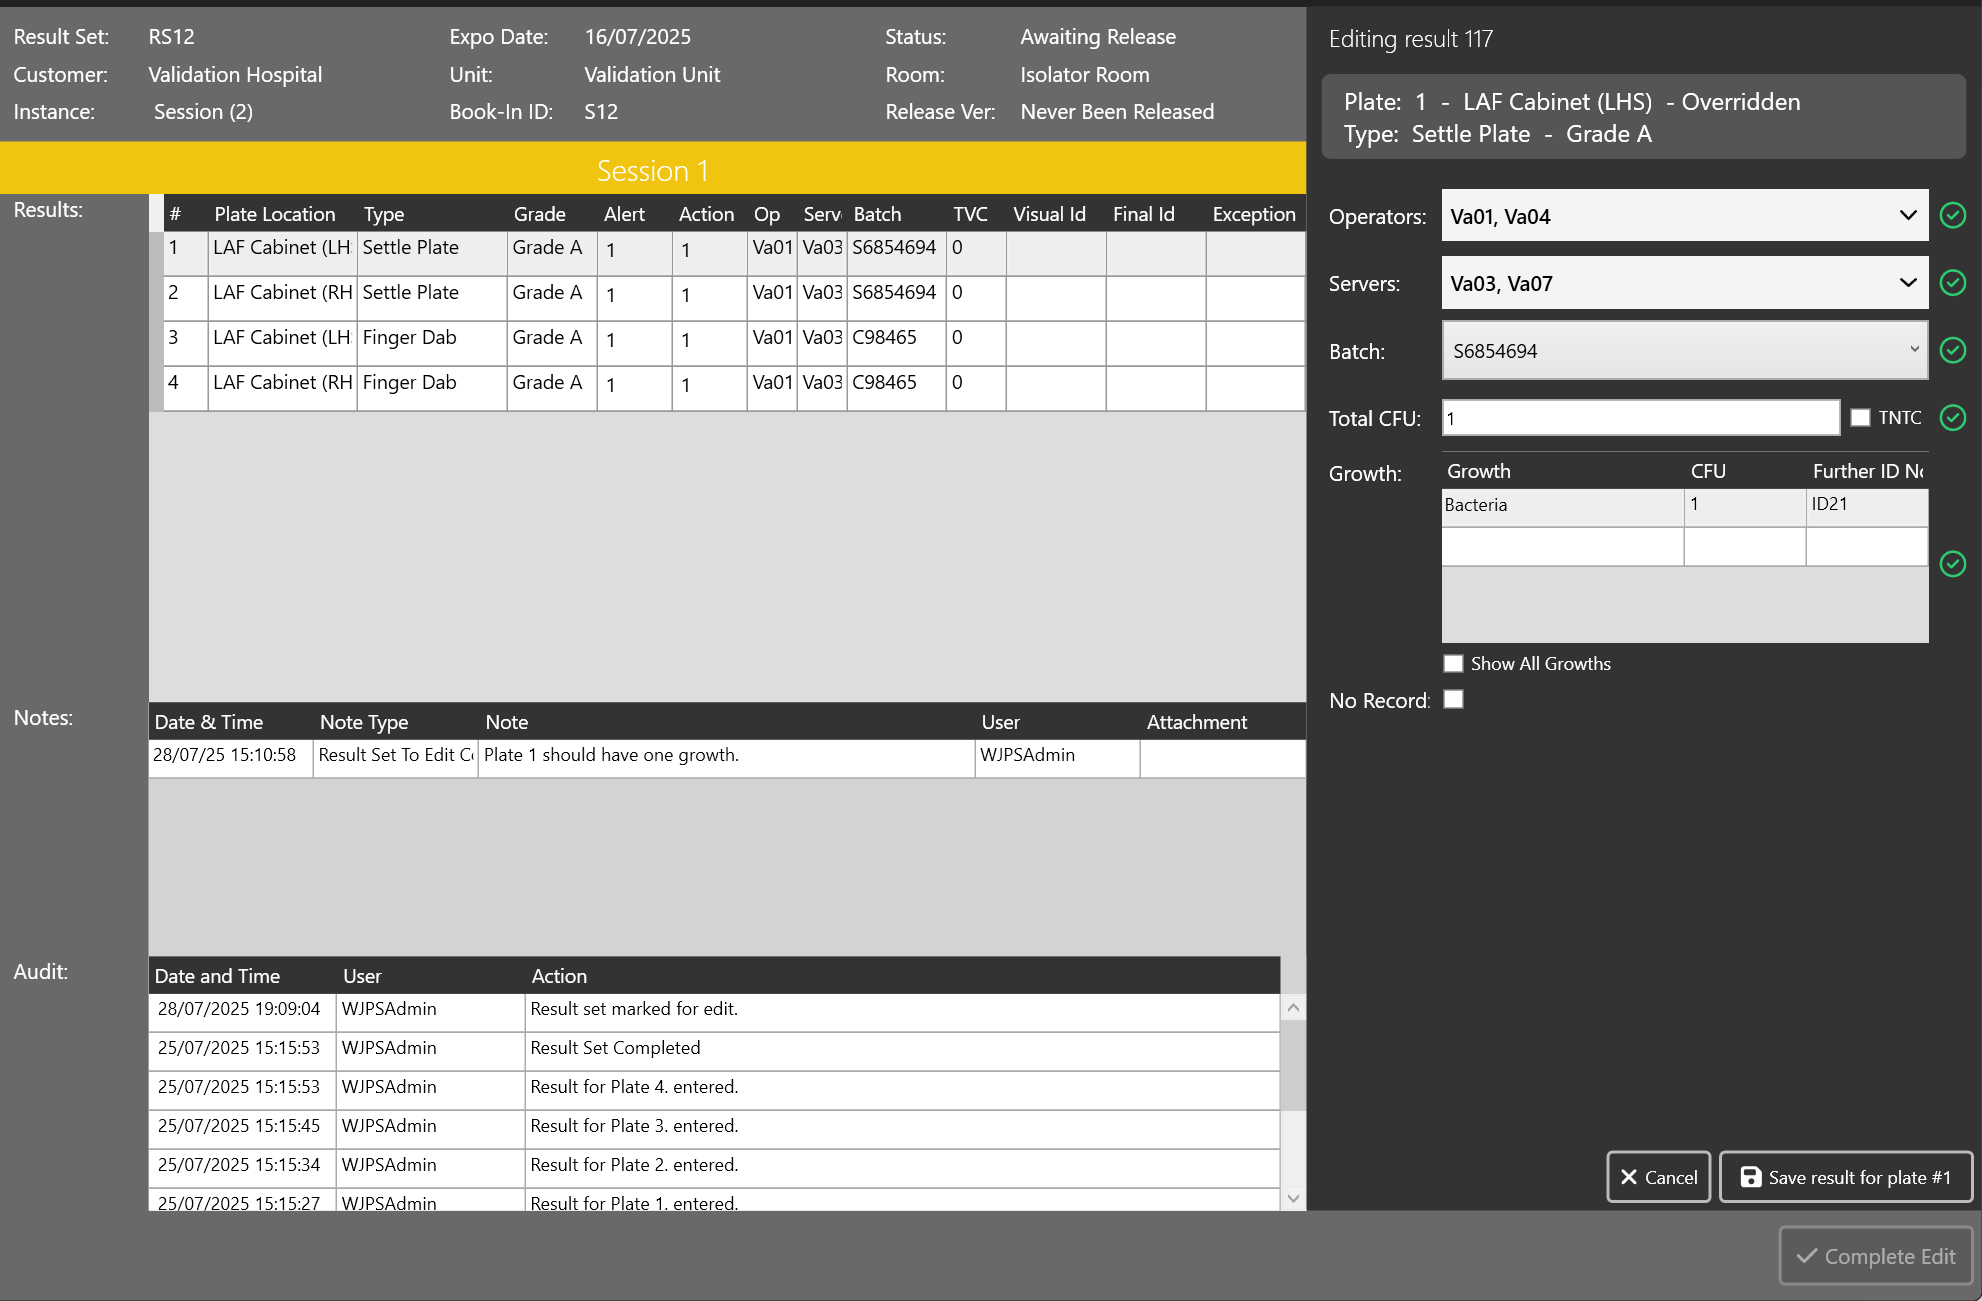
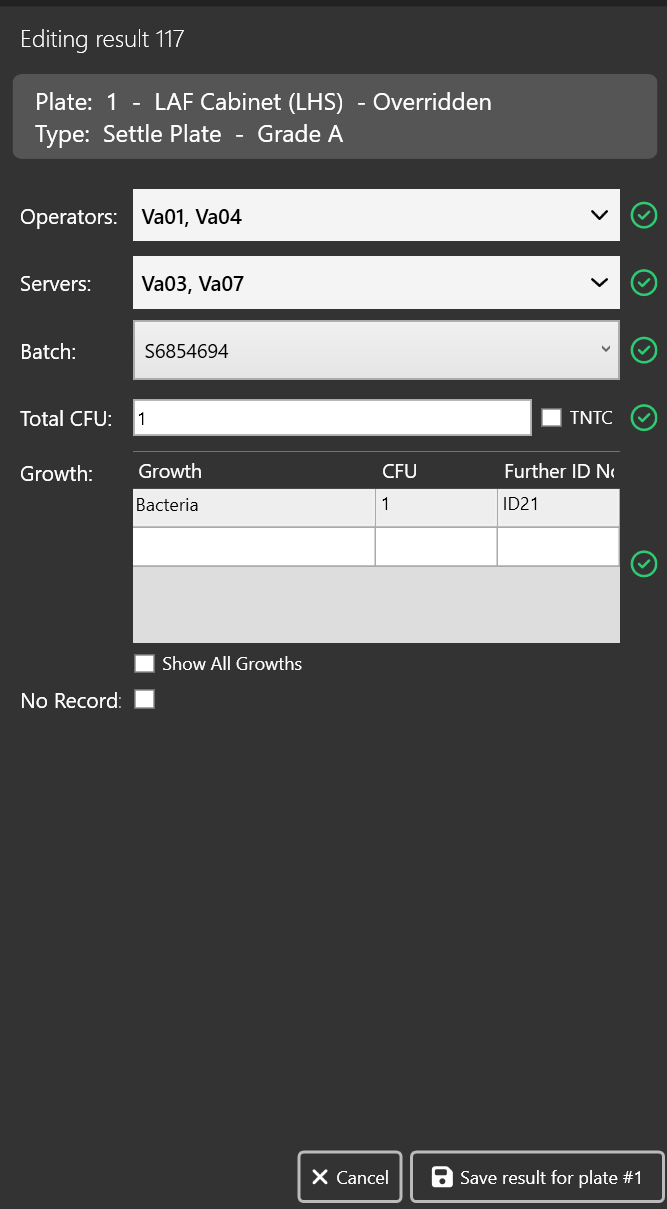
Enter the correct data in the Edit Result Form and click Save Result for plate:
You will then have to add a Note explaining the edit you have made.
When you have corrected all of the Results, click the Complete Edit button at the very bottom-right of the window to finish Editing the Result Set.
The Result Set will now have disappeared from the To Edit section and will return to the relevant section within View Results.
