¶ Plate Markup
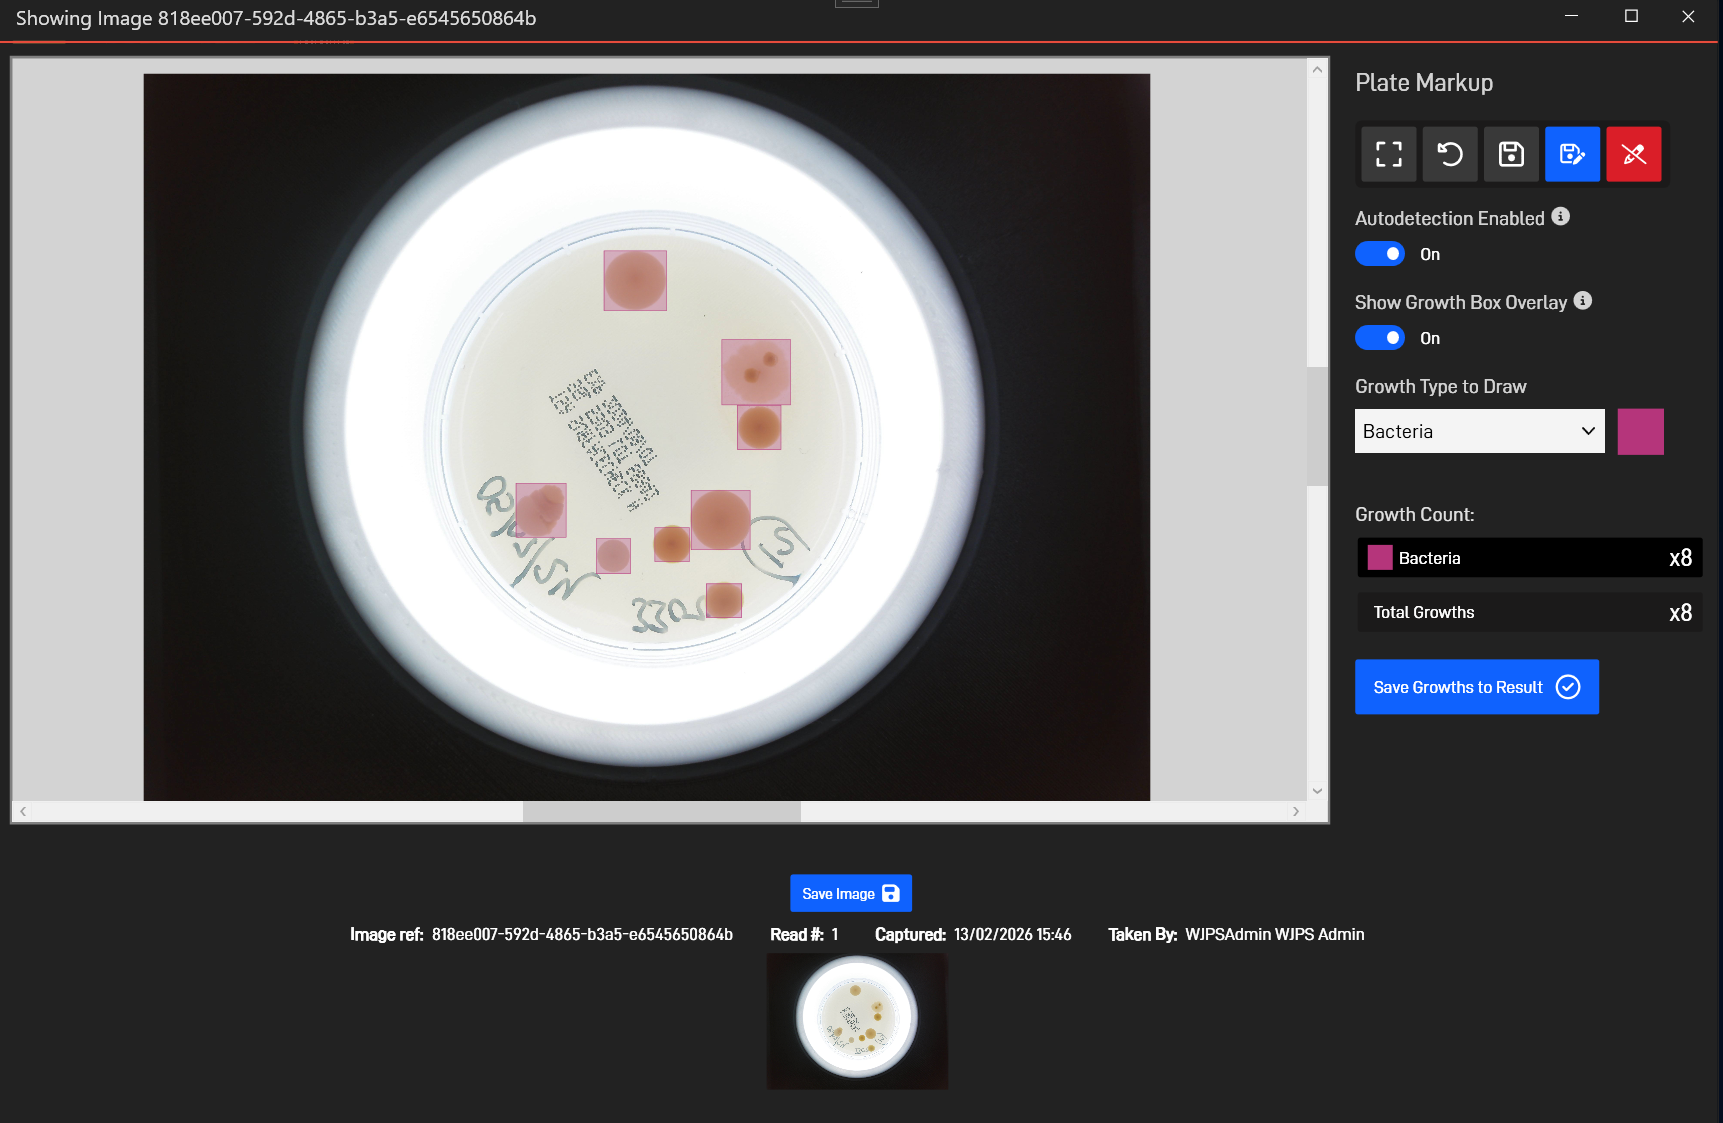
When the Plate Markup feature is enabled, Images depicting growths can be marked up with Growth data that is then displayed via an overlay for simple and intuitive visualisation.
If plates are marked up within the ‘Enter Results’ section, the marked up growths can then be transferred to the Result itself, saving time re-entering information.
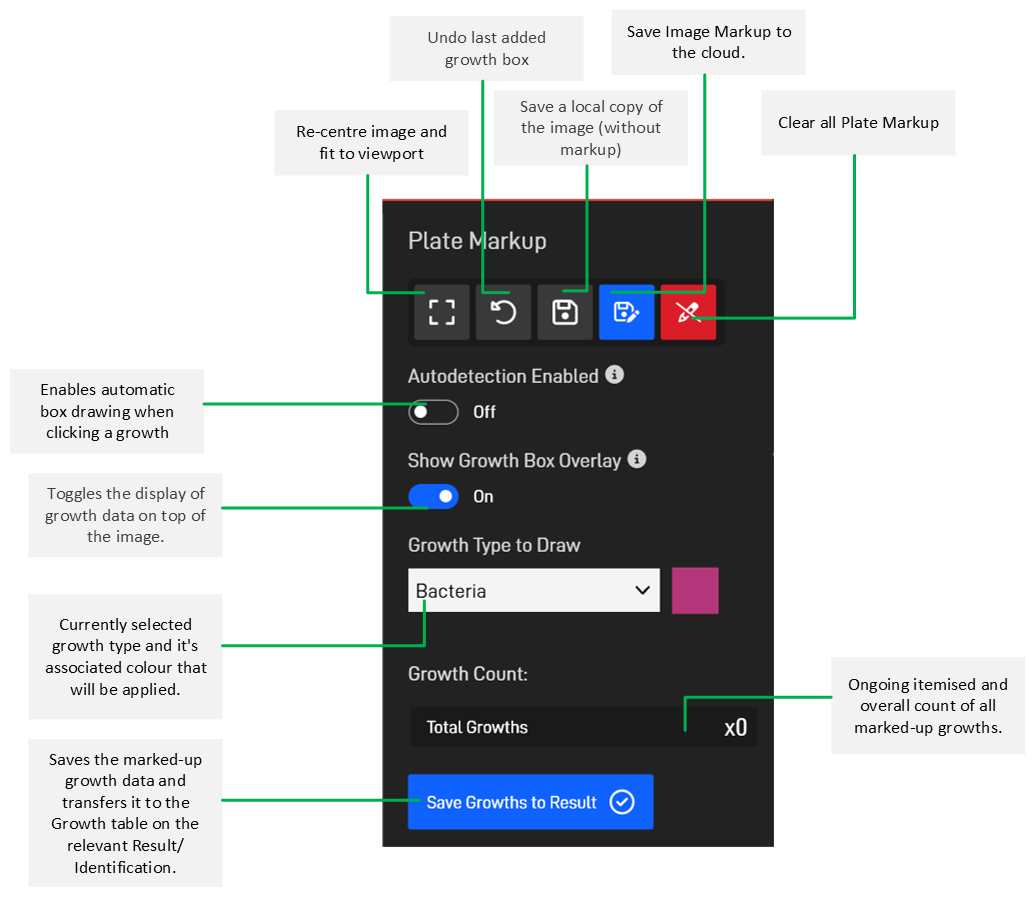
¶ Markup Toolbar
The markup toolbar is used to add markup data and is laid out as follows:
¶ Marking up an Image
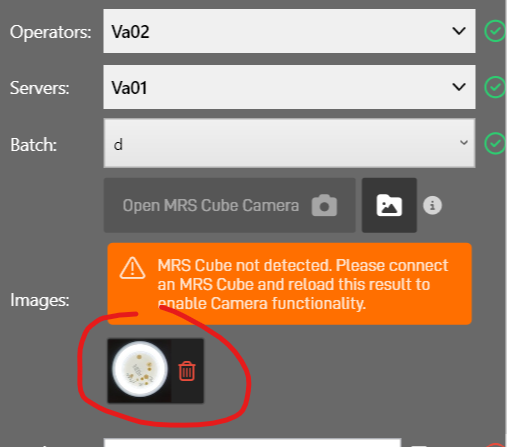
A plate image must first be captured before markup can be added. See the Plate Image Capture section for details on how to do this.
Once an image has been captured, click on the thumbnail below the Image Capture section to bring up the Image Viewer.
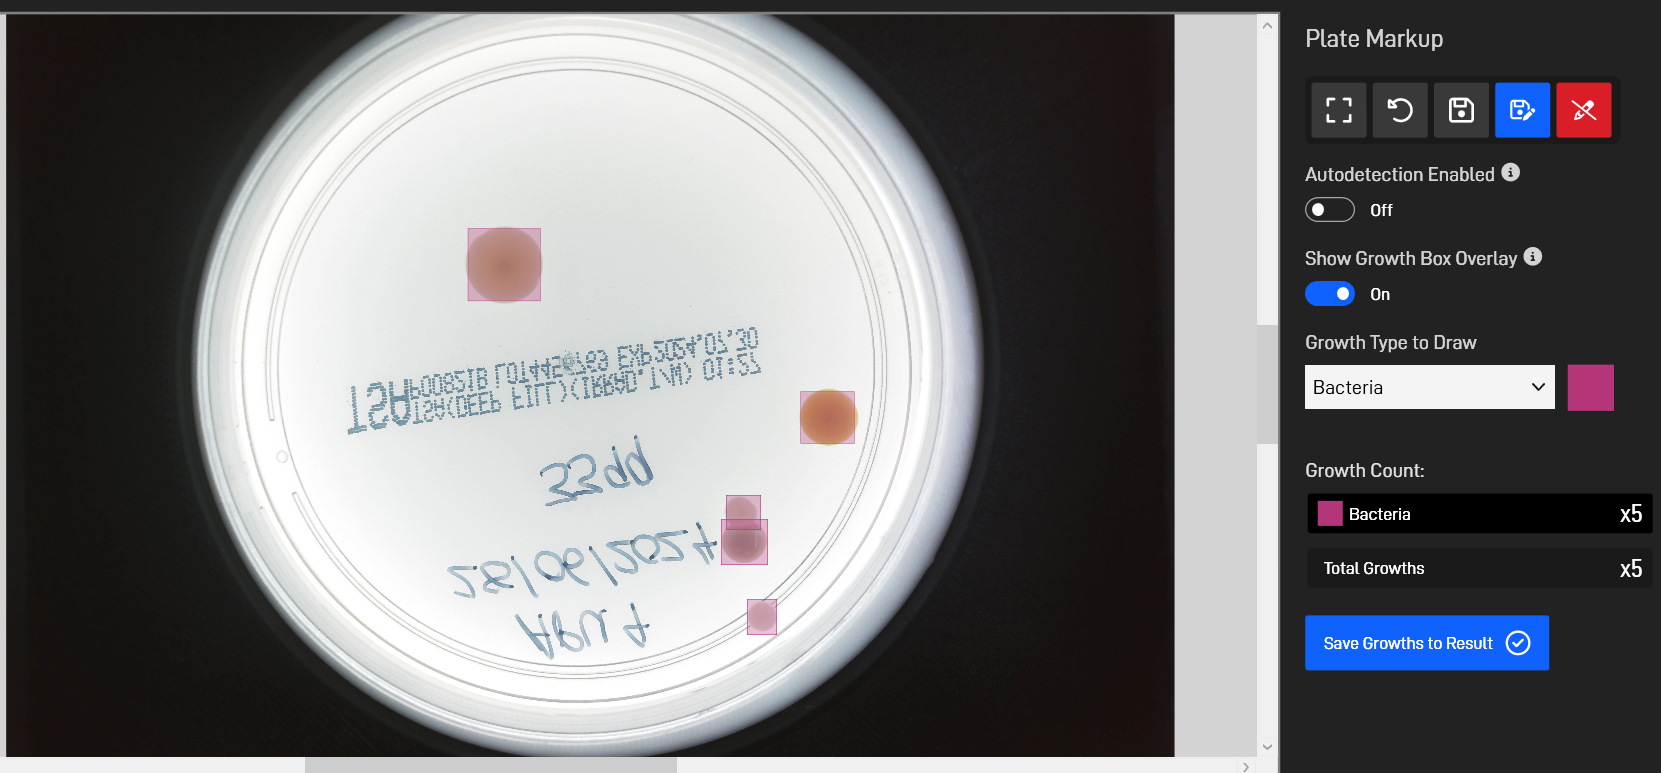
If markup is enabled, the markup editor pane will display on the right-hand side.
If autodetection is not enabled, to mark up the image, select the ‘Growth Type to Draw’ from the menu, and then click and drag a box over the growth using the left mouse button.
Growth Type colours can be set within the Growth Type Editor. If no colours are set manually, then MRS will automatically assign colours for you.
If autodetection is enabled, you can simply click on the growth and MRS will attempt to determine its extent, and draw a suitably sized bounding box around it.
Autodetection accuracy can vary greatly depending on how distinct the selected growth is and if there is any overlap with neighbouring growths. If clicking in the centre of the growth doesn’t yield a suitable bounding box, try clicking near to the outer edge of the growth.
If you want to undo the previously added Growth box, you can use the Undo button in the Markup pane, or use the Ctrl + Z keyboard shortcut.
Once all Growths have been marked up, you can either use the ‘Save Markup’ button in the toolbar to save the Markup without applying it, or press the Save Growths to Result button, to apply the markup to the selected Result/Identification. If markup is applied, the image viewer window will close and growth data will then be transferred back to the relevant Result/Identification and update the growth entries/counts:

¶ Viewing Plate Markup
If Plate Markup has been applied to an image, it should show by default when viewing the image from within the MRS client, though it can always be toggled on or off by using the Show Growth Box Overlay button in the Markup Pane.
When viewing Image Markup from a completed result set, markup editing functions will be disabled.